How to Use Jumper Cables to Jumpstart a Car Safely
You’re in a hurry, and your car won’t start. It’s frustrating, right?
But there’s a simple tool that can save the day: jumper cables. These cables are like magic wands for your car’s battery, capable of bringing it back to life when it’s completely drained. If you’ve ever felt the panic of a dead battery, knowing how to use jumper cables can be a game changer.
Imagine the relief of hearing your engine roar back to life, all because you knew the right steps. In this guide, we’ll show you exactly how to use jumper cables to jumpstart your car, so you’re never left stranded. With straightforward instructions and practical tips, you’ll gain the confidence to tackle this common car issue with ease. Don’t let a dead battery ruin your plans—learn how to jumpstart your car and get back on the road quickly. Ready to become a roadside hero? Let’s dive in!
Gathering Necessary Equipment
Gather the necessary equipment before jumpstarting a car with jumper cables. Ensure you have quality jumper cables and a functional power source, like another car with a charged battery. Proper preparation prevents accidents and ensures a smooth jumpstart process.
Gathering the necessary equipment is the first step to jumpstarting a car. Proper preparation ensures a smooth and safe process. Having the right tools on hand can make a world of difference. Let’s explore the essential items you need to get started.Choose The Right Jumper Cables
Jumper cables come in various lengths and thicknesses. Choose cables that are at least 10 feet long. This length provides flexibility between the cars. Thicker cables offer better conductivity. Look for cables with 4 to 6 gauge ratings. Insulated clamps are crucial for safety. They prevent accidental electric shocks. Ensure the clamps are easy to open. Sturdy clamps ensure a strong grip on the battery terminals.Locate A Working Vehicle
Find a vehicle with a fully charged battery. Ask a neighbor or friend for assistance. The vehicle should match your car’s voltage. Most cars use a 12-volt system. Ensure the working vehicle is parked close. The cars should not touch each other. Leave enough space for easy cable connection. Both vehicles should be in park or neutral. Turn off all electronics before starting.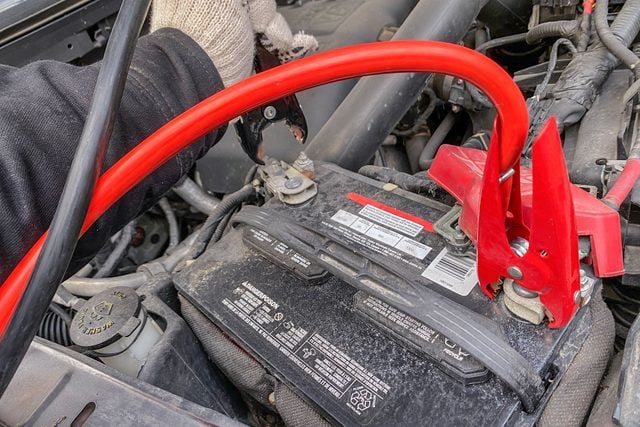
Credit: www.familyhandyman.com
Positioning The Vehicles
Position the vehicles close enough for the jumper cables to reach both batteries safely. Ensure both cars are turned off and parked securely before proceeding.
Positioning the vehicles correctly is a crucial step when you need to jumpstart a car. It might seem like a simple task, but ensuring the vehicles are in the right position can make the process smoother and safer. Let’s dive into the details of how to position the vehicles effectively to get your car back on the road.Park Cars Close Together
Make sure the two cars are parked close enough for the jumper cables to reach both batteries. The front of the cars should face each other, ideally with about 18 inches to 2 feet of space between them. This ensures that the cables can easily connect without being stretched or strained. Avoid touching the vehicles together. Even though you want them close, they should not come into contact, as this could cause an electrical short. Use this opportunity to check that the parking brakes are engaged to prevent any accidental movement during the jumpstart process.Ensure Both Cars Are Off
Before proceeding, double-check that both vehicles are turned off. This is a critical step to prevent any electrical mishaps. It might seem obvious, but in the rush of getting your car started, it’s easy to overlook. Take a moment to remove the keys from the ignition of both cars. This not only ensures safety but also prevents accidental ignition while you are setting up the cables. Once everything is off, you’re ready to connect the jumper cables and bring your car back to life. Have you ever found yourself rushing this step only to realize the cables won’t reach? Positioning the vehicles correctly saves time and frustration. By following these steps, you ensure a smooth and efficient jumpstart every time.Connecting Jumper Cables
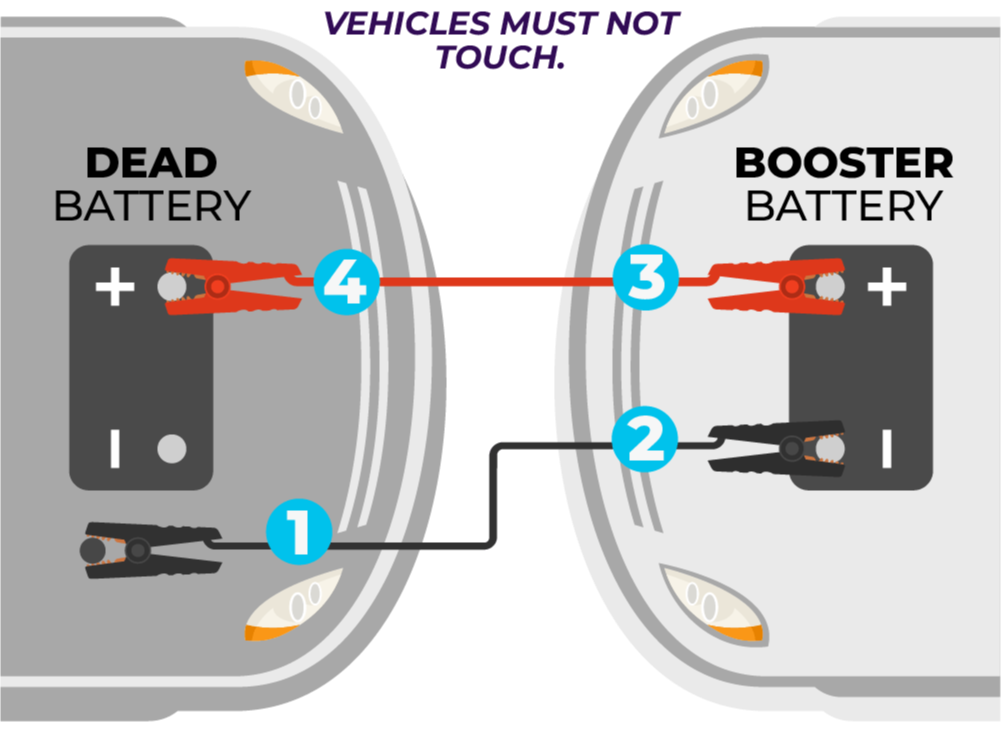
Connecting jumper cables is essential for jumpstarting a car. Attach the red cable to the positive terminal on both batteries. Connect one end of the black cable to the negative terminal of the working battery and the other end to an unpainted metal surface on the car needing the jump.
Jumpstarting a car using jumper cables can feel like a daunting task if you’ve never done it before. But with a bit of guidance, it can become second nature. The key is knowing how to connect the cables correctly to ensure safety and effectiveness. Let’s walk through the steps to get your car up and running again.Identify Positive And Negative Terminals
Before you dive in, familiarize yourself with your car battery’s terminals. The positive terminal is usually marked with a “+” symbol and may have a red cover or cable. The negative terminal often has a “-” symbol and is connected to a black cable. Taking a moment to identify these will make the next steps smoother.Attach Positive Cable To Dead Battery
Start by attaching the positive (red) cable to the positive terminal of the dead battery. Ensure the clamp is secure and makes good contact. A loose connection can lead to inefficiencies and might even spark, which no one wants to deal with.Connect Positive Cable To Live Battery
Next, take the other end of the positive cable and connect it to the positive terminal of the live battery. This step mirrors the previous one. It’s crucial to maintain a firm connection here as well to ensure the current flows properly.Attach Negative Cable To Live Battery
Now, grab the negative (black) cable and attach it to the negative terminal of the live battery. Ensuring a solid connection here is just as important as the positive terminal connections. It completes the circuit needed to transfer power.Connect Negative Cable To Ground
Finally, connect the other end of the negative cable to a metal part of the dead car’s engine block or frame. Avoid attaching it to the negative terminal of the dead battery. This reduces the risk of sparking near the battery, which could be dangerous. By following these steps, you’re not just jumpstarting a car—you’re building confidence in your ability to handle roadside challenges. Have you ever wondered how a simple set of cables can empower you to turn a frustrating situation into a minor inconvenience? Now you know.Starting The Car
Using jumper cables to jumpstart a car involves connecting the cables to both car batteries. First, attach the red cable to the positive terminal of the dead battery. Then, connect the other end to the positive terminal of the working battery.
Attach the black cable to the negative terminal of the working battery and connect the other end to an unpainted metal surface on the dead car. Start the working car, then try to start the dead car.
Starting a car with jumper cables seems daunting. Yet, it’s a simple task with the right steps. This guide helps you do it safely and efficiently. Ensure both vehicles are off before connecting cables.Start The Working Vehicle
Turn on the working car. Let it idle for a few minutes. This allows the battery to transfer power. Keep the engine running to maintain a steady power flow. Listen for any unusual sounds. All sounds should be normal.Attempt To Start The Dead Car
Now, try to start the car with a dead battery. Turn the ignition key. Listen for the engine to start. If it doesn’t, wait a few more minutes. Then, try again. Sometimes the battery needs more time. If the car starts, let it run for a while. This helps recharge the battery.Removing Jumper Cables
Disconnect jumper cables carefully after jumpstarting a car. Remove the negative cable first to ensure safety. Follow with the positive cable.
Jumpstarting a car isn’t just about connecting cables. Successfully reviving a dead battery also means knowing how to safely remove those jumper cables once the engine is purring again. This step, often overlooked, is crucial to avoid sparks or even damage to your vehicle’s electrical system. Imagine the relief of hearing your car roar back to life, only to be dampened by a misstep in disconnecting the cables. Let’s ensure your jumpstart process ends on a high note by mastering the art of cable removal.Disconnect Negative Cable From Ground
Start by removing the negative cable from the grounded car. This is typically the car that was dead. Carefully detach the black clamp from the metal surface or terminal. This step is vital in preventing electrical shock or short circuits.Remove Negative Cable From Live Battery
Next, move to the car that provided the jump and remove the negative cable. Keeping your hands steady, release the black clamp from the battery terminal. This ensures that the circuit is broken and the connection is safely ended.Detach Positive Cable From Live Battery
Now, focus on the positive cable on the live battery. Gently remove the red clamp. This step helps avoid electrical arcs that might occur if the positive cable is left connected for too long.Remove Positive Cable From Dead Battery
Lastly, return to the initially dead battery and remove the positive cable. Once the red clamp is off, ensure all cables are clear of any moving parts. Your car should now be ready to drive, but do you know how long to keep it running to recharge the battery fully?Safety Precautions
Ensure both cars are turned off before connecting jumper cables. Attach the red cable to positive terminals and black to negative. Keep hands and clothing away from moving engine parts.
Jumpstarting a car is simple, but safety is crucial. Knowing safety measures can prevent accidents. Read carefully before using jumper cables.Avoid Sparks
Sparks can ignite fumes, causing danger. Keep metal parts away from each other. Never touch cable ends together. Ensure clamps don’t touch metal surfaces. Always connect cables in the correct order. Connect the positive cable first. Disconnect in reverse order. Always stay alert to avoid mishaps.Ensure Secure Connections
Loose connections can cause accidents. Securely attach cables to battery terminals. Check clamps for stability. Ensure clamps grip tight. Wiggle clamps to confirm a secure fit. A firm connection ensures a safe jumpstart. Keep cables away from moving engine parts. A loose cable can lead to damage.Troubleshooting Common Issues
Safely connect jumper cables to both car batteries, ensuring positive and negative terminals align correctly. Start the working car, then attempt to start the dead one. If unsuccessful, check cable connections and battery charge before trying again.
Jumpstarting a car can be tricky if you face common issues. Understanding these challenges can save time and ensure a smoother process. Here are solutions to typical problems you might encounter while using jumper cables.Battery Won’t Charge
A dead battery might not charge due to several reasons. Ensure the connections are tight and clean. Dirty terminals prevent proper contact. Use a brush to clean them. Check if the donor car’s battery is powerful enough. It should be fully charged and match the voltage of your car’s battery. Inspect the cables for any damage. Damaged cables won’t conduct electricity well. If the battery is very old, it might be time for a replacement.Cables Overheat
Overheating cables can be dangerous. It often happens due to wrong connections. Ensure the cables are attached to the correct terminals. Positive to positive, negative to negative. Check if the cables are in good condition. Frayed cables cause overheating. Use thick cables for better conductivity. Thin cables might not handle the current. Allow the cables to cool before touching them. If they continue to overheat, consult a professional.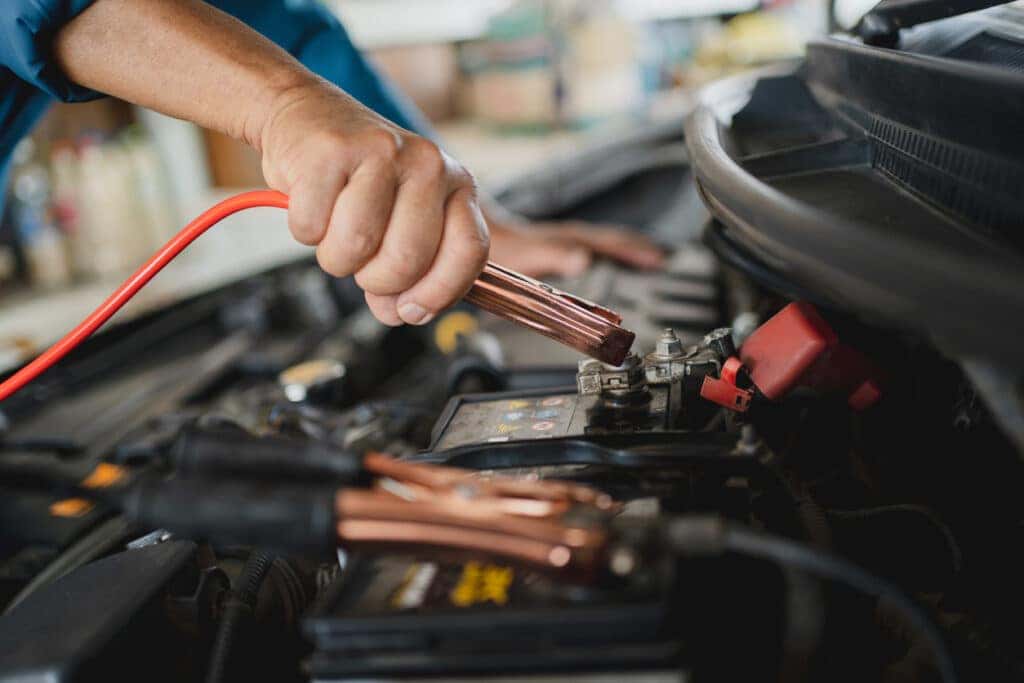
Credit: www.gallagherautos.com

Credit: www.youtube.com
Frequently Asked Questions
What Is The Correct Order To Attach Jumper Cables?
Attach the red cable to the dead battery’s positive terminal. Connect the other red end to the donor battery’s positive terminal. Attach the black cable to the donor battery’s negative terminal. Connect the other black end to an unpainted metal surface on the dead vehicle.
Start the donor car first.
How To Jump A Car With Jumper Cables For Dummies?
Park cars close, turn off engines, and open hoods. Connect red cable to positive terminals, then black to negative. Start donor car, then recipient. Remove cables in reverse order. Ensure cables don’t touch.
Which Jump Cable Do You Connect First?
Connect the positive jump cable to the dead battery first. Attach the other end to the good battery’s positive terminal. Then, connect the negative cable to the good battery’s negative terminal. Finally, secure the other end to an unpainted metal surface on the car with the dead battery.
Should The Car Be On Or Off When Using Jumper Cables?
The car should be off when connecting jumper cables. Start the working car first, then start the dead car. This ensures safety and prevents electrical surges. Make sure both cars are in park or neutral. Always follow the correct order of connecting and disconnecting cables for optimal results.
Conclusion
Jumpstarting a car is easy with the right steps. Grab your jumper cables. Make sure both cars are off. Connect cables in the correct order. Start the working car. Then, start your car. Let it run for a few minutes.
Disconnect cables in reverse order. Now, your car should be ready to go. Remember these steps for next time. Always keep jumper cables handy. They are a useful tool for emergencies. Practice makes it easier. Be safe and careful. Stay prepared and confident on the road.

Similar Posts